CLICK HERE FOR FREE BLOGGER TEMPLATES, LINK BUTTONS AND MORE! »

Pages

Friday, October 15, 2010

More Houzz inspiration

Have you checked out Houzz yet?  I love this site! 

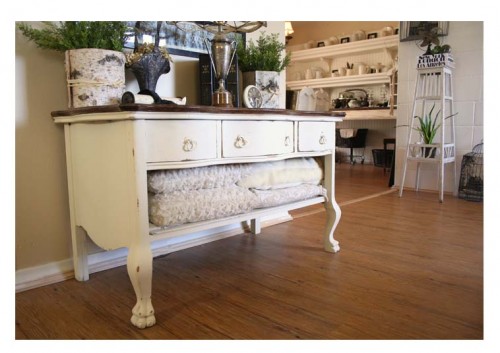
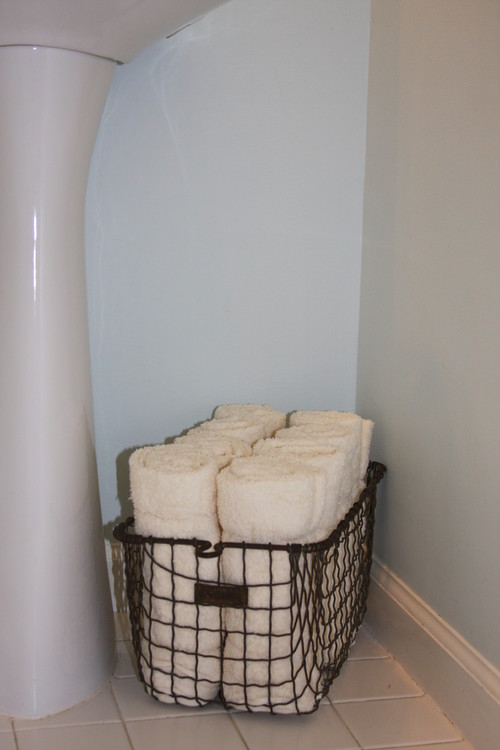
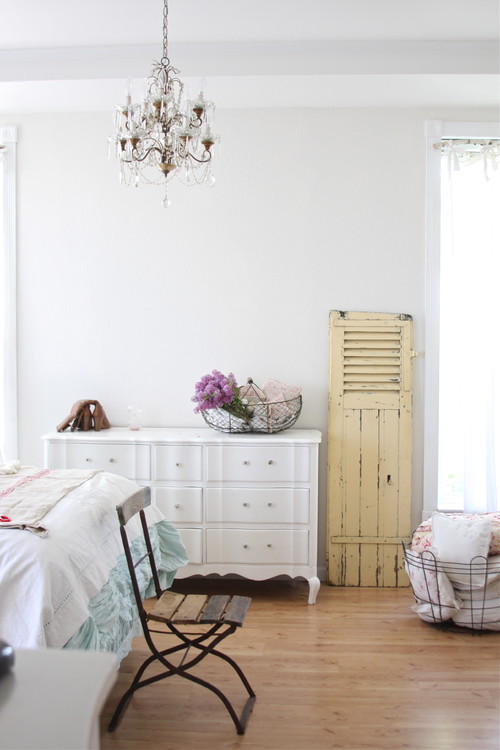
This is a great idea for if you are missing a drawer {ahem, Jen...} or just want to change up a dresser a little.  I have also seen people put baskets in the place of missing drawers.
The Old Painted Cottage traditional living room
traditional living room design by los angeles showroom The Old Painted Cottage

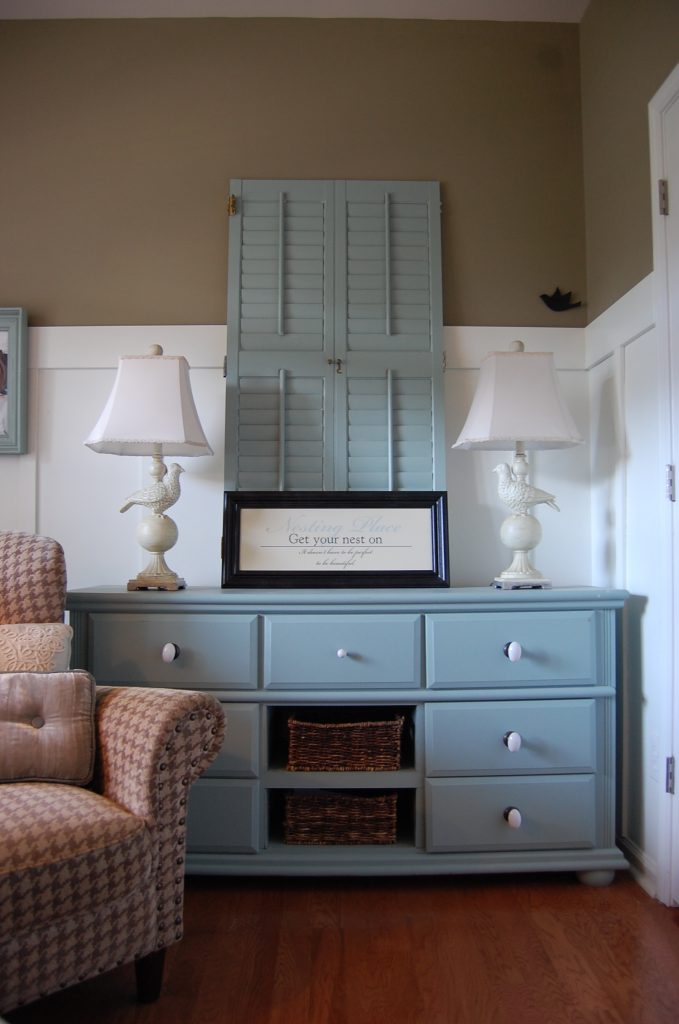
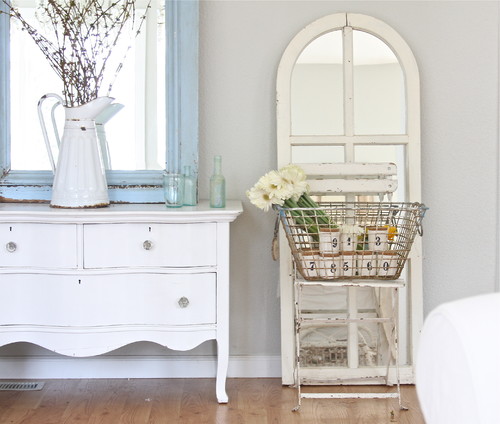
ETA:  here is an example of using the baskets with a dresser {From the Nester}


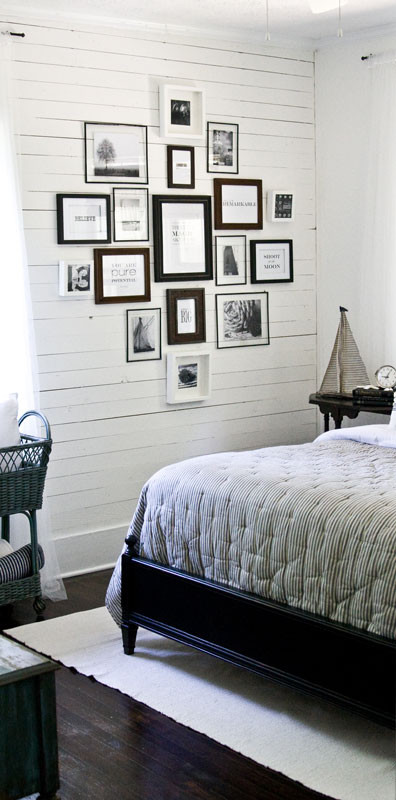
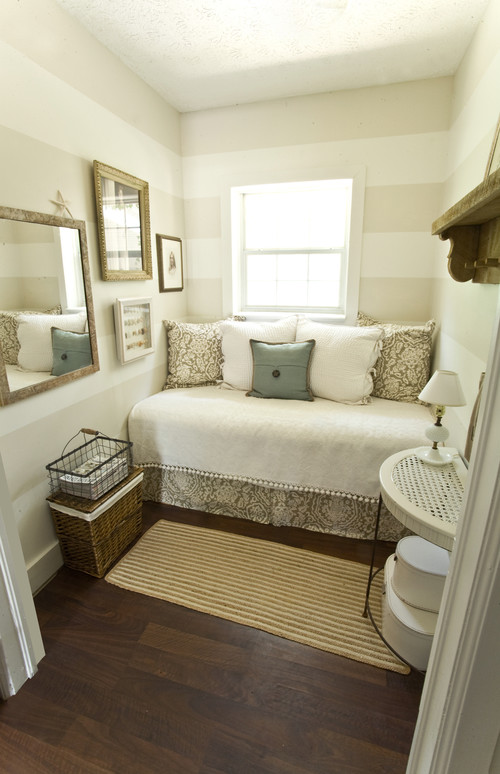
I love this display wall that Layla from The Lettered Cottage did in her guest bedroom...I am trying to come up with some ideas for a big wall in our newly painted toy room {will have to post some pics}
Lettered Cottage Guest room traditional bedroom

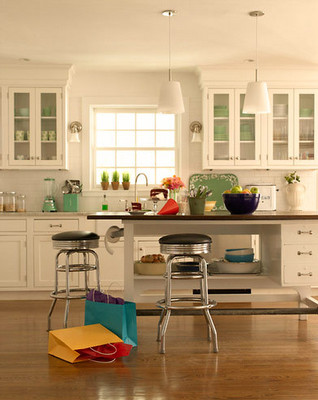
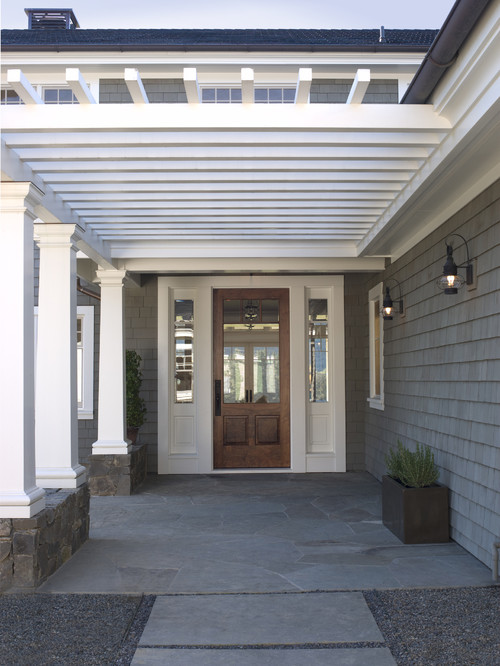
I love this blue door! {And the pine floors!}
color combos - blue
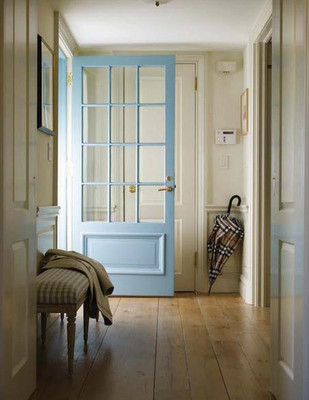
home design  {Source?}

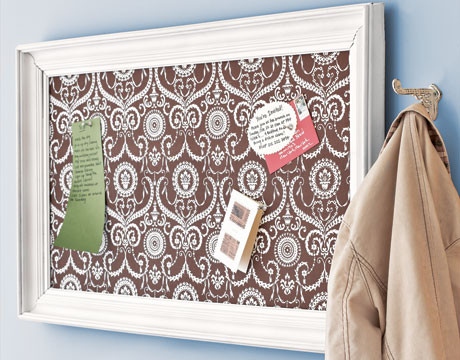
Isn't this a cute bulletin board?  I have an empty frame {or 3} that I have been debating about what to do with.  I have too many ideas and sometimes that's bad because it makes me so indecisive!
Bulletin Board traditional home office


I love everything about this office...the striped walls, white furniture, the fact that it looks clean and organized... :)
Striped Tan & White Office eclectic home office
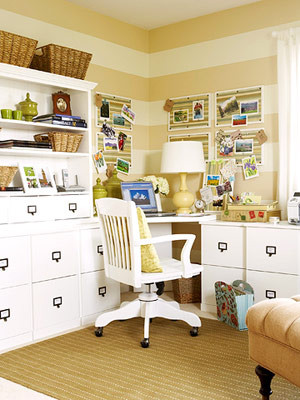
eclectic home office design {Better Homes & Gardens}


Now, go on and check it out for yourself!!  You will be inspired.

Tuesday, August 17, 2010

Inspiration

So, it's been awhile...it never meant to be that long, but it sort of just happened.  We have been enjoying the summer.  I have been just too lazy to get my pictures onto the computer and to post.  I have lots of plans and ideas for the fall though.  I'm hoping to be a little more productive then when it's not so hot outside.  Me and heat don't mix all that well for the most part.  Fall is my favorite. 

So, anyhow, I can't seem to find the site where I got these pictures from.  I'm pretty sure it was called "Found," but I didn't save the info, just the images and now I'm not sure how to get back there to link up to it.  If anyone knows, please let me know.

I just love this table!  I picture having one with different-colored chairs
I love jars.  Any and all kinds.  And colors.
I think frames are cool too
And trunks too.  But, mostly I just love that old chippy paint on them!


Wednesday, June 30, 2010

Summer Sausage Hobo Packets

I love almost anything grilled, but this recipe that I found (taken from the August '08 edition of Taste of Home simple & delicious) is really good! I posted this awhile back on my private blog, but thought that I would share here.  We just went camping last weekend and we made up the packets before heading out.  Then we cooked them right over the fire.  So tasty.  Hope you enjoy! 


{Makes 8 Servings} Prep: 25 min. Grill: 20 min.

Ingredients:


1 pound summer sausage, cut into 1-inch pieces

4 medium potatoes, peeled and cut into 1/2-inch cubes

3 cups shredded cabbage {I often just buy a bag of coleslaw mix}

1 large sweet onion, halved and sliced

1 medium green pepper, cut into strips

1 medium sweet red pepper, cut into strips

1 small zucchini, sliced

1 small yellow summer squash, sliced

1 pound chicken tenderloins, cut into 1-inch pieces {I almost always use cooked, shredded chicken, since I often have it on hand and then I don't have to worry about the chicken being cooked}

2 medium tomatoes, cut into wedges

1/2 cup butter, cut into eight cubes

1/4 cup prepared Italian salad dressing

Directions:

In a large bowl, combine the first eight ingredients. Gently stir in the chicken and tomatoes. Divide mixture among eight double thicknesses of heavy-duty foil (about 12 in. square). Top each with a butter cube.

Fold foil around mixture and seal tightly. Grill, covered, over medium heat for 20-25 minutes or until chicken is no longer pink and vegetables are tender. Carefully open foil to allow steam to escape; drizzle with dressing. Yield: 8 servings.


Nutrition Facts: 1 packet equals 436 calories, 28 g fat (12 g saturated fat), 98 mg cholesterol, 933 mg sodium, 23 g carbohydrate, 3 g fiber, 25 g protein.


Friday, June 18, 2010

Decorating on the cheap

I have struggled since day one with what to do with this 3-sided fireplace of ours.  It doesn't have your typical mantel to decorate.  Anyone else have solutions for what to do? Maybe I will have to post some better pictures of it to get your opinion. Well, as a result of my uncertainty, I change things up on here quite frequently.  Just thought I'd post my current set-up, since I'm not sure how long it will last.  :) 

I found this empty frame for around $10 at an antique outlet (couldn't pass up it's great detail), but you can usually find them at garage sales for cheaper than that.  The wreath was 25 cents at a garage sale.  It had wooden hearts attached everywhere to it with wire.  I simply snipped them off to simplify it.  These seem to be pretty common finds at garage sales for 25-50 cents.  Look past the seasonal and sometimes over-the-top accessories on them. I have a few saved for rainy-day projects.  It is cheaper than buying the basic wreath at a crafts store.  I found the ribbon in my stash of junk stuff.  I also already had the sticks & books.  And the glass jug was 50 cents at a garage sale.  Who said decorating has to be expensive?


Linking to:


A Giveaway

Just wanted to let you know of a great little giveaway over at Heather's blog, Post Road Vintage.  Leave her a comment on this post to enter.  She also has an etsy shop with some great treasures.  Make sure to go and check it out!


Friday, June 11, 2010

Fun with Fabric Transfers

So, I followed Melissa's tutorial on how to make a cute and personalized onesie gift, found here.  I thought it was such a cute and fun idea for something different.  Here's my take on it.  I have plans to make more things using these transfer paper sheets soon. 

First, I experimented with different fonts and sizes.  You can use what fonts you already have on your Microsoft Word program, or you can download free fonts at any number of sites.  Just google "free fonts".  I used http://www.dafont.com/.  Using your ink jet printer, print your words/monogram/initial/picture/whatever-you'd-like in a mirrored image.  You can do this by checking out the advanced printer settings.  Make sure your quality on your printer is at it's highest (not in draft mode).  You should be able to fit at least 4 on a sheet, depending on how big your image is.  {Just trying to get you more bang for your buck!}  :)  I found my Light Fabric Transfer sheets at Wal-Mart.  I got 12 sheets for $7 {sale price}.

Next, iron your shirt/onesie on a hard surface.  Such as your kids' play table, so that you can keep an eye on them...

Read directions....always...just like I do...ha-ha!


Cut out/around image/text and press down with iron to get these:

And this...aren't they cute?
 Hopefully you will now be inspired to go and create your own one-of-a-kind shirts!


I am linking this up to these sites:


Make it Yours @ My Backyard Eden


Tuesday, June 1, 2010

Houzz

Have you ever heard of Houzz?  If not, you must go and check it out!  It's such a fun site.  Especially if you are building a house, remodeling or are just looking for some inspiration in a room.  You can view other people's ideabooks and add pictures to your own.  Works as a great reference tool.  I love having a picture (or ten) to explain what I'm thinking.  I still like to tear out magazine pages too, but this is just so much easier and clutter-free!  Here are a few of my favorites:

kitchenlove  kitchen
I love a white kitchen...so bright and airy...the possiblities are endless with white

The Lettered Cottage traditional bedroom
The Lettered Cottage
Love these stripes {both direction and colors}


Love how they turned this old wooden crate into a decorative mantel piece...also love the framed map and great jars used as candle holders


Gast Architects: Projects traditional entry
traditional entry design by san francisco architect Gast Architects

And finally for tonight...I will close with this great entry/door.  Love it! 

Go check out www.houzz.com and let me know what you think!

Saturday, May 22, 2010

My First


This was my first sign.  It's a fairly big one.  2'x3'.  I had John router an edge on it, then I painted it.  It's a bit crooked and not perfect.  But, that's okay.  I have been having fun scouring garage sales looking for my next victim (wood, that is, not people).  I might be going overboard, but it will keep me busy for awhile after garage sale season is over.  I don't like to be one to regret anything.  :)  Will post some garage sale finds soon!  Have a good weekend!

Thursday, May 13, 2010

Signature

Have you ever wondered how to add that cute and personal-looking signature to the end of one of your blog posts?  Well, wonder no longer.  Donna at Funky Junk Interiors has a great tutorial and link HERE to guide you through the simple process.  It's fast, easy and fun.  Good luck and show me what you come up with!


Wednesday, May 12, 2010

Life

"We women have a lot to learn about simplifying our lives. We have to decide what is important and then move along at a pace that is comfortable for us. We have to develop the maturity to stop trying to prove something. We have to learn to be content with what we are.
As you create a home, don’t get distracted with a lot of things that have no meaning for you or your family. Don’t dwell on your failures, but think about your successes. Have joy in your home. Have joy in your children. Have joy in your husband. Be grateful for the journey."
~Marjorie P. Hinckley


I saw this quote recently online and it struck me. I am getting better about this. I really am. I used to worry about things "matching" or going well together in my house. To an extent, I guess I still do, but now I mostly buy things that I love. It doesn't matter what other people think of your house, because if you love it, then it works. It's home. It's what brings joy to your life. Aside from your husband and kids, that is. :)


My joyous living room. I've become obsessed with wire baskets. I want some more. They seem to look great with just about anything in them!

whimages eclectic powder room

Like this one to hold towels
Dreamy Whites
Or, this one {above and below} to hold decorations {Photos from Dreamy Whites}

Dreamy Whites

Oh, if only I was going to the flea market this weekend! {Sigh} Maybe it's best that it didn't work out. I probably would have found too many things to buy. Right?? :)

Monday, May 10, 2010

A new sign

This is how it all started. My fascination with signs. And my inability to find the kind of signs I wanted. I have many pictured in my head. Finding the time to create and paint them is the problem. I have decided to paint my own. {And will paint one for you too if you’d like} I can pick my own shapes and sizes and colors and fonts and so on.

A Goodwill find {not sure what language this was on here…German, maybe?}:


AFTER


From Trash to Treasure

Okay, so I am having some technical difficulties with my posts and pictures. Does anyone else have any issues with Windows Live Writer? It's giving me a format error and won't post my pictures. Grr. I will have to figure things out. But in the meantime, here is a backwards post for you! I'm too impatient to wait on posting even if the pictures are in the wrong order!

AFTER:

Here is my great find from junk picking a couple of weeks ago. I knew right away what I would do with it and jumped right on it (unlike some other projects I have hanging out around here!) The glass was gone from the frame, but I didn’t want it anyway, so it was perfect. I just spray painted it with some flat white paint and added cork to make it a bulletin board. Easy-peasy.


BEFORE: I loved the detail on it, but it was dirty and not too pretty


Wednesday, May 5, 2010

Chalkboard Renovation

Hi there! I thought I'd start off by showing you one of my first projects. When I started looking at my pictures to write this post, I realized that if I'm going to do tutorials, I think I should take more pictures! So, hopefully things will improve as I continue on here. Smile

First of all, I started with this nice rooster (can I get a "cock-a-doodle-doo"?) picture from Goodwill for $1.99. No offense to those who like roosters or rooster prints, but I was aiming to make myself a chalkboard.

Then I took some acrylic paint I had on hand and painted the border. It took a few coats.

Here's what that looked like. I didn't bother taping the inside since I knew I'd be painting that too

I let this dry and taped the border so that I could paint the inside. I used a spray can of chalkboard paint (found it at Home Depot) and followed the directions. Sorry no pictures of the process. Might have been entertaining ones though! I usually try to squeeze in my projects in those tiny little pockets of time during the day (or late night) when I don't have all three girls needing me.

I did have to sand lightly in between coats of chalkboard paint since you could faintly see the outline of the rooster.

Let dry and "season" by rolling chalk all over surface. Write a message, menu, store list or whatever your pretty little heart desires.

Sorry, I know you can't see the bottom border of it since it's propped above my cabinets, but it's the same as the top. Overall it was a cheap and fun way to add some height in my kitchen.

ETA: I am working out the kinks with my pictures and editing software. Please bear with me. I am computer illiterate!

ETA {Part 2}: Ha! It's late. That's my excuse. I want to add that I did take some sandpaper to the edges and border of this after it was all dry to lightly distress it. The end. I promise.

LinkWithin

Related Posts with Thumbnails